Selenium is a suite of tools for automating web browsers. It enables you to automate browser tasks like clicking links, completing forms, and traversing web sites by writing scripts in a variety of programming languages. Selenium IDE and Selenium WebDriver are the two primary Selenium components.
Selenium IDE
A Firefox add-on called Selenium IDE (Integrated Development Environment) enables you to record, edit, and replay tests using a graphical user interface. (GUI). It offers a straightforward method for producing automated tests without using code. To check that a web application is functioning as planned, you can record your activities on a web page and play them back using Selenium IDE. The Selenium IDE can output tests in a variety of formats, including HTML, Java, and Python, and it supports a number of programming languages, including Ruby, Python, and Java. A little prior understanding of JavaScript would be helpful for you to understand the concepts more clearly when you get to utilize selenese commands like runScript, even though writing test cases on Selenium IDE may not require any programming language.
Selenium IDE- Commands (Selenese)
Selenium commands, also known as “Selenese” are the set of commands used in Selenium IDE that run your tests. Using selenese, one can perform activities like:
- UI elements’ presence is being checked based on their HTML tags.
- Test for specific content.
- Among other things, testing input fields, choice lists, submitting forms, and table data.
- Test for broken links.
- Testing of many more web application features, including window size, mouse choices, alerts, pop-up windows, event handling, and Ajax capabilities.
Types of Selenium Commands
A sequence of Selenium commands (Selenese) together is known as test script. Selenium instructions can be divide in section of three groups:
- Actions
- Accessors
- Assertions
1. Actions
The selenium commands known as actions are used to generally modify the application’s state. Events such as clicking this link, choosing the option, typing this box, etc. are produce by the execution of actions. The execution of the current test is keep in halt if an Action fails or contains a problem. Some of the most commonly used Actions commands include:
- open (url) : It takes both relative and absolute URLs and opens the appropriate URL in the chosen browser.
- type (locator,value) : It sets the value of an input field, similar to user typing action.
- typeKeys (locator,value) : Using the supplied element as a target, this command simulates keystroke occurrences.
- close() : This command simulates the user clicking the “close” button in the title bar of a popup window or tab.
2. Accessors
The selenium commands known as accessors look into the application’s state and save the findings in variables. They are also use in to create Assertions automatically.
The following are some of the most used Accessors commands:
- storeTitle (variableName) : gets the title of the current page.
- storeText (locator, variableName) : gets the text of an element.
- storeAllButtons (variableName) : It returns the IDs of all buttons on the page.
3. Assertions
The instructions used by testers to check the application’s status are known as assertions. There are three common uses for assertions: assert, verify, and waitfor.
The following are some of the most used Assertions commands:
- verifySelected(selectLocator, optionLocator) : This command checks to see if the drop-down’s selected option satisfies the optionSpecifier.
- verifyAlert (pattern) : verifies the alert text; used with accessorstoreAlert.
- verifyAllButtons (pattern) : verifies the button which is use in with accessorstoreAllButtons.
- verifyAllLinks (pattern) : verifies all links; used with the accessorstoreAllLinks.
Selenium IDE Set-up
We presume you already have Mozilla Firefox installed on your system since Selenium IDE is only accessible as a Firefox and Chrome plug-in. However, you can access Firefox’s official website by clicking the link provided below to access the most recent version.
https://www.mozilla.org/en-US/firefox/new/
Steps
- Launch Mozilla Firefox browser.
- Open URL https://addons.mozilla.org/en-us/firefox/addon/selenium-ide/ .It will redirect you to the official add-on page of Firefox.
- Click on “Add to Firefox” button.

- A pop-up dialog box will be appeared asking you to add Selenium IDE as extension to your Firefox browser.
- Click on “Add” button.

- Restart you Firefox browser.
- Go to the top right corner on your Firefox browser and look for the Selenium IDE icon.
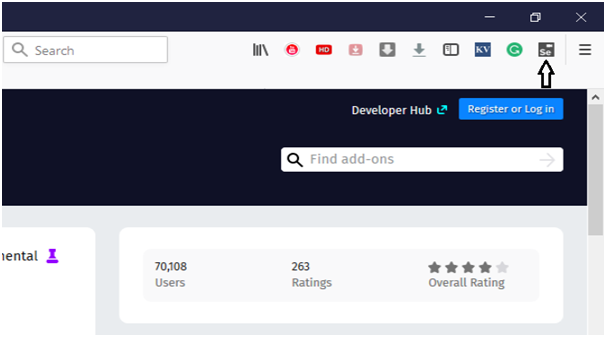
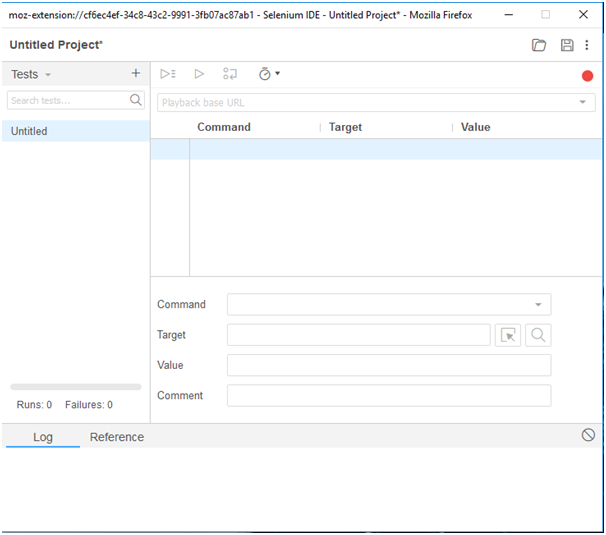
- Click on that icon to launch Selenium IDE.
Highlights and Challenges
Highlights
- Easy to Use: Selenium IDE is an easy-to-use tool that does not require any programming skills or knowledge of complex coding languages.
- Record and Play: Selenium IDE allows you to record and play back tests. This means that you can record a series of actions that you want to test, and then play them back to verify that they work correctly.
- Multiple Browser Support: Selenium IDE supports multiple browsers like Firefox, Chrome, Safari, and Internet Explorer, allowing you to test your web application on different browsers.
- Test Case Management: Selenium IDE allows you to manage your test cases effectively, allowing you to create, edit, and delete test cases as needed.
- Extensibility: Selenium IDE can be extended with plugins and add-ons, allowing you to customize and enhance its functionality.
- Cross-Platform Compatibility: Selenium IDE is a cross-platform tool that can be used on Windows, Mac, and Linux.
- Open Source: Selenium IDE is an open-source tool, which means that it is freely available and can be modified and customized as needed.
Challenges
- Limited test coverage: Selenium IDE only tests the user interface of a web application, and cannot test non-UI elements like databases, APIs, or servers.
- Lack of programming support: Selenium IDE does not support programming languages such as Java, Python, or Ruby. This may limit the scope of the tests that can be created and run.
- Record and playback only: Selenium IDE is based on the record and playback method, which can be limited in terms of test creation and execution.
- Limited debugging: Selenium IDE does not offer advanced debugging options, which can make it difficult to troubleshoot problems that may arise during test execution.
- Limited extensibility: Selenium IDE is not easily extensible, which can make it challenging to add custom functionality to the tool.
Selenium Web driver
A programming interface for communicating with web browsers is called Selenium WebDriver. It allows you to write automated tests in various programming languages, such as Java, Python, and Ruby, and execute them in different web browsers, such as Chrome, Firefox, and Safari. You can interact with elements on a web page by clicking links, completing forms, and submitting data using WebDriver, which gives you a mechanism to programmatically manage the browser. It is a powerful tool for automating web browsers. It is a collection of open source APIs that allow you to control a web browser through programming, enabling you to simulate user actions, such as clicking buttons and entering text, and test web applications by automating browser interactions. WebDriver is widely used in software development and testing, and it is a valuable tool for ensuring the quality and reliability of web applications
With WebDriver, you can perform a variety of tasks, including:
- Navigating to web pages and interacting with web elements (e.g., buttons, links, input fields)
- Filling out forms and submitting them
- Scrolling and zooming in/out of web pages
- Taking screenshots of web pages
- Testing web applications by creating automated test scripts
Why Selenium Web driver?
- Easy to set up and use: Selenium Web Driver is easy to set up and use. It has a simple and user-friendly API that allows you to write test scripts quickly and easily.
- Language support: Selenium Web Driver supports multiple programming languages like Java, Python, C#, Ruby, and JavaScript. This allows developers and testers to use the language they are most comfortable with.
- Fast execution: Selenium Web Driver is designed to execute test scripts quickly and efficiently, which saves a lot of time in the testing process.
- Cross-browser compatibility: Selenium Web Driver supports multiple browsers, including Chrome, Firefox, Safari, and Internet Explorer. This means that you can write a test script once and run it on different browsers without making any changes.
- Supports parallel testing: Selenium Web Driver allows you to run multiple tests in parallel, which saves time and helps you test your web application more efficiently.
- Open-source: Selenium Web Driver is an open-source tool, which means that it is free to use and can be modified as per your requirements.
- Integration with other tools: Selenium Web Driver integrates easily with other tools like Jenkins, TestNG, and Maven, which makes it easier to automate the entire testing process.
Selenium Web Driver Installation
Selenium WebDriver installation process is completed in four basic steps:
- Download and Install Java 8 or higher version.
- However, you can download the latest version of Java Development Kit (JDK) from the link given below.
- http://www.oracle.com/technetwork/java/javase/downloads/index.html
- After downloading and installing the most recent version of Java, you must configure your system’s environment variables or establish the path. To learn how to specify a path and configure environment variables in Java, click the link provided below.
- https://www.javatpoint.com/how-to-set-path-in-java
2. Now download and configure Eclipse or any Java IDE of your choice.
- Open URL: https://www.eclipse.org/downloads/ .
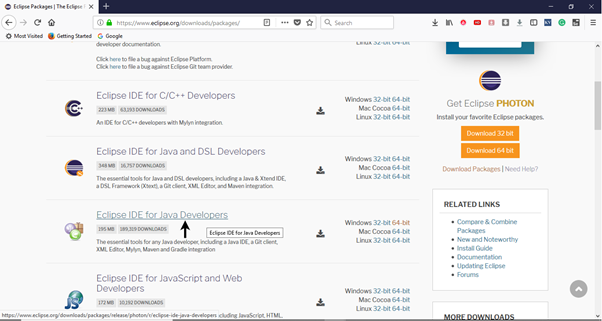
- Select the “Download Packages” link. (You can also download the IDE directly from the “downloads page” of Eclipse official website, but we will recommend you to navigate through the download packages section and get “Eclipse IDE for Java Developers”).
- You will be forward to the area title “Download Packages.” On the webpage, select “Eclipse IDE for Java Developers” as you scroll down.
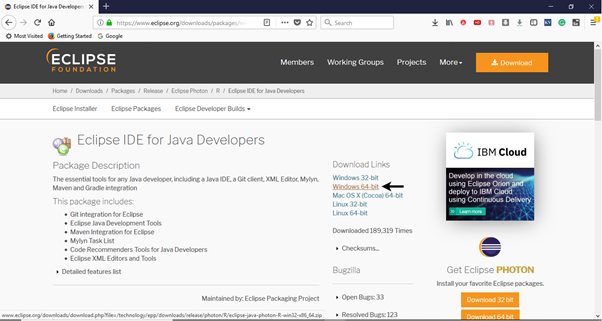
- Click “Windows 64-bit” in the Download Links area. Depending on the operating system you are using right now, you can also choose other download choices.
- The downloaded file would be in zipped format. Unpack the contents in a convenient directory .Then Double click on “eclipse” (.exe file).
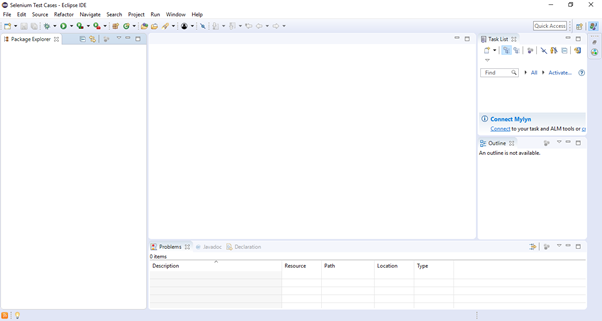
- To configure the workspace, select a convenient directory where you want to keep all of your Selenium trails and click on Launch button. It will launch the default interface of Eclipse IDE.
3. Download Selenium WebDriver Java Client
- Open URL: https://docs.seleniumhq.org/download/
- It will redirect you to the “downloads page” of Selenium official website.
- Scroll down through the web page and locate Selenium Client & WebDriver Language Bindings.
- The downloaded file would be in zipped format. Unpack the contents in a convenient directory. It contains the essential jar files required to configure Selenium WebDriver in Eclipse IDE.
4.Configure Selenium WebDriver
We will now set up Selenium WebDriver in our Eclipse IDE. In order to build Selenium Test Scripts, we will simply create a new Java Project in Eclipse and load all the necessary jar files.
- Launch Eclipse IDE
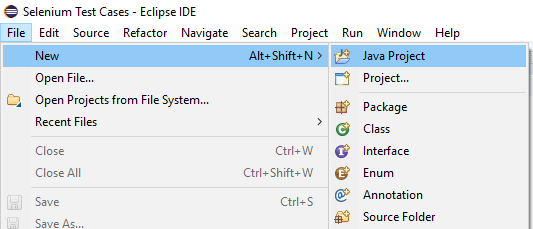
- Create a new Java Project from File > New > Java Project.
- Give your Project name as “Demo_Test”, leave the other fields unaltered and click on “Finish” button. It will create a new Java project with the following directories.
- Right click on the “src” folder and create a new Class File from New > Class.
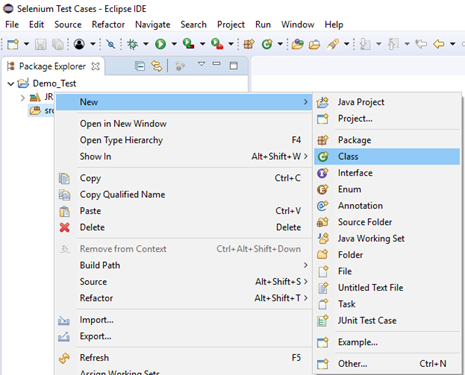
- Give your Class name as “First” and click on “Finish” button.
- Now, we will add the Selenium jar files in our Test Suite (Demo_Test). For that Right click on “Demo_Test” folder and select Properties.
- It will launch the Properties window for our “Demo_Test” Test Suite. Then Click on “Java Build Path” option from the left hand side panel.
- Switch to Libraries tab and click on “Add External JARs” button.
- Locate the directory where you have downloaded the Selenium jar files, select the respective jars and click on “Open” button. Repeat the same steps for the jars which are present under the “libs” folder
- Once you get all the Selenium jar files in your Libraries tab, click on Apply and Close button.
Hence, we have successfully configured Selenium WebDriver with Eclipse IDE. Now, we are ready to write our test scripts in Eclipse and run it in WebDriver.
Drawbacks
- Time-consuming test creation: Creating and maintaining tests with Selenium WebDriver can be time-consuming, as it requires significant programming knowledge and expertise.
- Cost of maintenance: Maintaining a suite of Selenium WebDriver tests can be costly in terms of time, resources, and personnel. It requires constant update to keep up with changes in the website or application being test.
- Lack of reporting capabilities: While Selenium WebDriver can generate test results, it may not have robust reporting capabilities, and developers may need to rely on additional tools to generate comprehensive reports.
- Limited testing of non-web functionality: Selenium WebDriver is designed specifically for testing web applications and cannot be used to test non-web functionality like mobile apps or desktop applications.
Conclusion
Overall, Selenium IDE is a powerful tool that can help you create automated tests quickly and easily, allowing you to save time and improve the quality of your web application. The simplest and most accessible testing tool that doesn’t need any setup is without a question the Selenium IDE. It can quickly fit. It has a wide range of commands that can capture a variety of situations to test a web application on the browser and is lightweight and cross-browser compatible . Also, Selenium Web Driver is a powerful tool that offers several advantages for web developers and testers, making it an essential tool for web application testing. For businesses building applications that support high traffic, particularly social platforms and e-commerce websites, Selenium software is perfect. Over the years, this software have had changes, which has improved web creation.