What is Nx?
Developers can use Nx, a powerful toolkit, to efficiently build, scale, and manage large applications. Also, Nx provides a neat work area that allows multiple projects, libraries, and shared codes to co-exist within a single repository. Since, using React With Nx monorepo, teams can easily organise and maintain complex projects, making it a popular choice for large-scale applications.
How Nx Boosts React Projects?
By automating processes like code generation, supplying reusable libraries, and incorporating tools for code quality and testing, Nx makes development easier for React developers. Also, it enhances build performance, maintains excellent code quality, and aids in managing intricate projects. Moreover, Nx makes development easier and helps you grow and manage your React projects better. Moreover, it works well for both small and large business applications.
Step-by-step guide
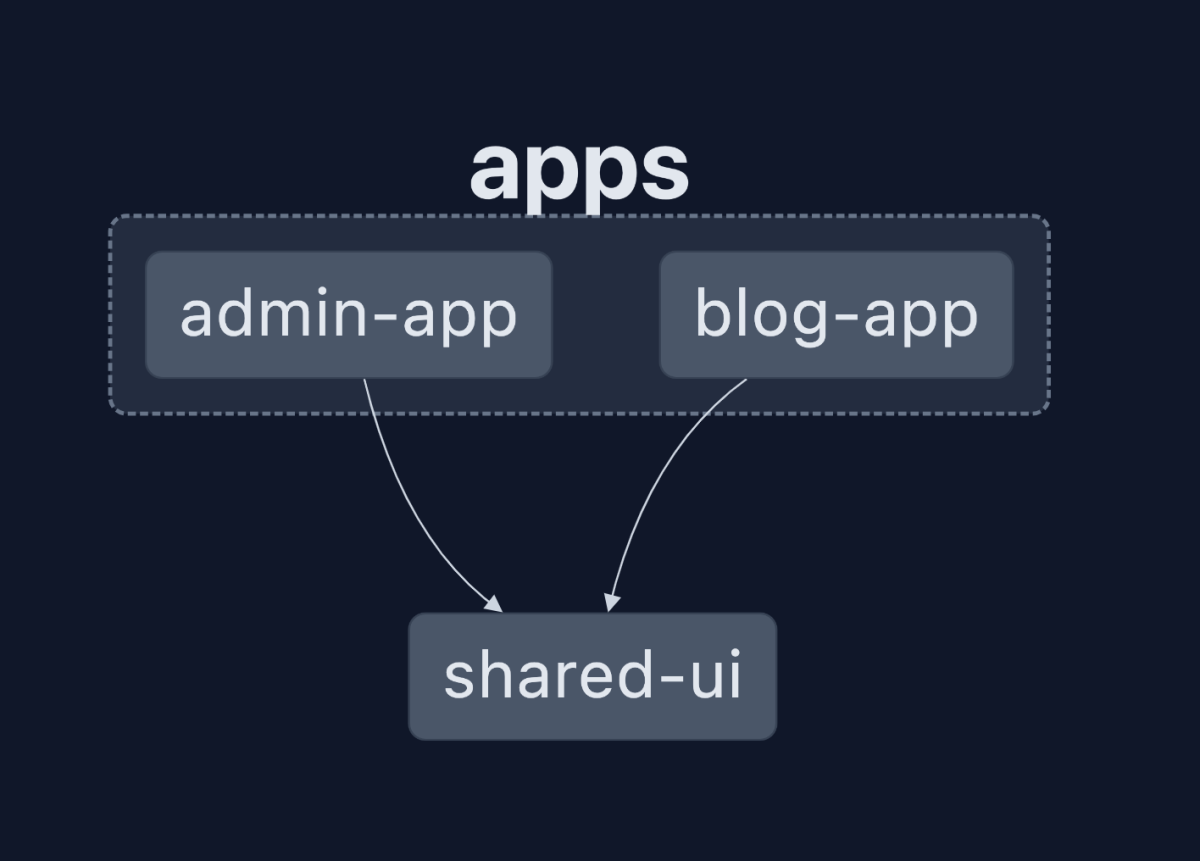
Hence, in this article, we will build a monorepo using Nx that contains two simple React applications: a Blog App and an Admin App, along with a shared library as Shared-UI that both apps can use for common UI components. Moreover, Nx will help us manage these apps and the library efficiently, ensuring code reusability and consistency across projects.
We will create two separate React applications within the same workspace: a Blog App for the frontend and an Admin App for managing content. Here I have mentioned only about the Nx setup process, so Admin app and Blog app won’t have any complete functionality.
Step 1: Setting Up React with Nx Monorepo Workspace
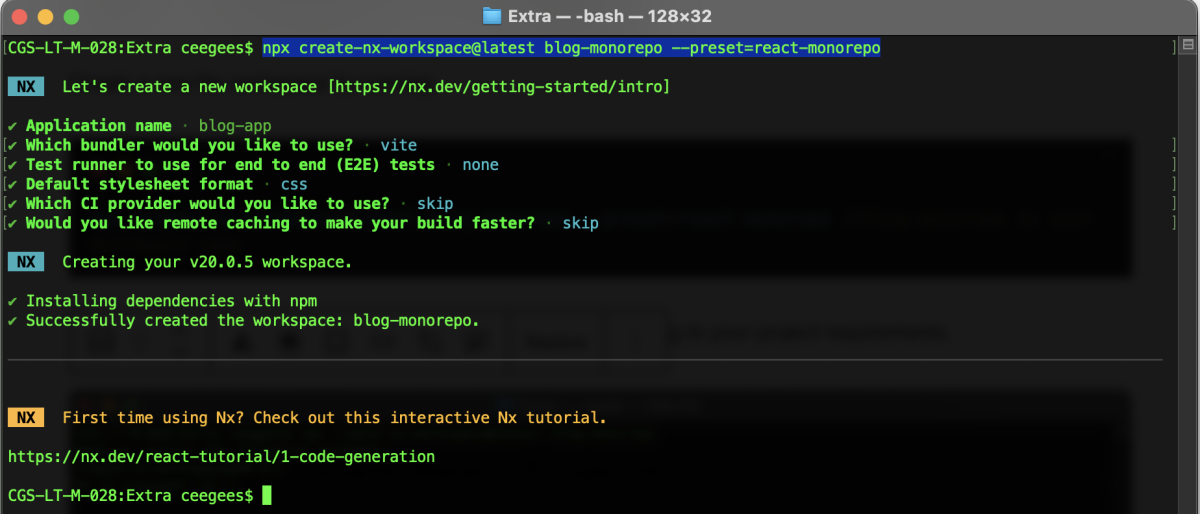
Firstly, create a new Nx workspace by running:
//blog-monorepo is the workspace name
npx create-nx-workspace@latest blog-monorepo --preset=react-monorepo
You will be prompted to answer a few questions, choose according to your project requirements.

The prompt will ask you to enter an application name. Also, you can choose any name or leave it blank; if you don’t specify a name, the application will use your Nx workspace name by default. Here, I named the application “blog-app” to set up our initial React app using Nx.
Step 2: Generating a React App with Nx:
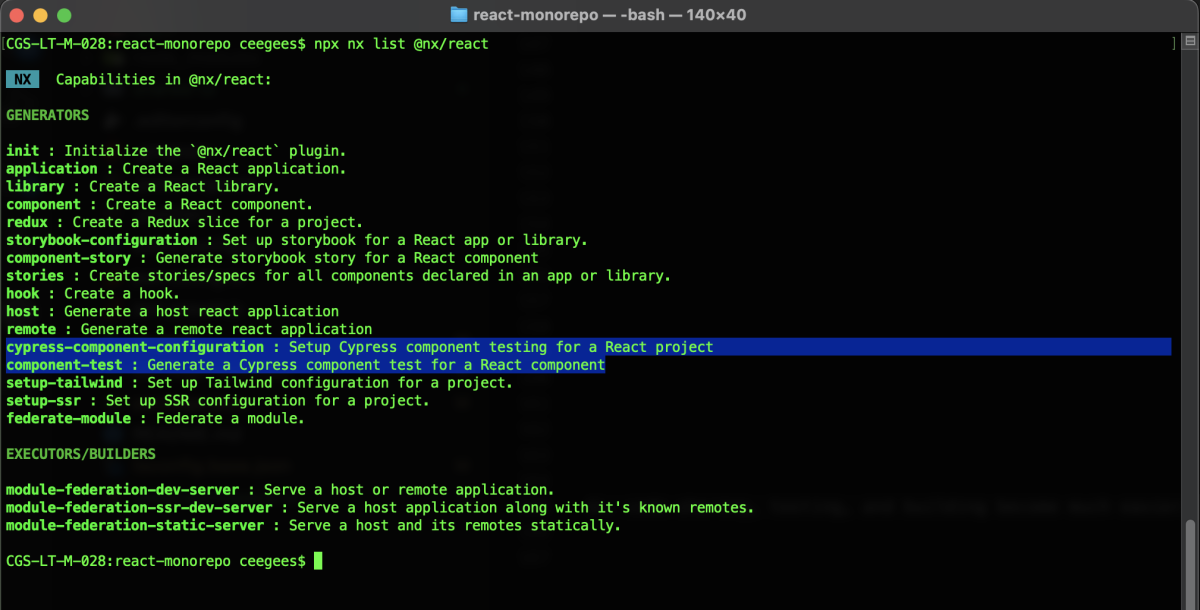
npx nx list @nx/react //To see what capabilities the @nx/react plugin provides//It will prompt for some extra settings, choose based on your project requirements
nx generate @nx/react:app apps/admin-app This will create another folder called admin-app inside apps/. In brief, the admin app will act as the backend to manage blog content, including posts, users, and settings. Additionally, it will help in streamline the process of organising this information
After running these commands, your apps/ folder should look like this:
apps/
├── blog-app/
└── admin-app/
Each app has its own src/ folder, which contains the components, styles, and logic for the individual application.
Step 3: Creating a Shared UI Library in Reacwith Nx
Thirdly, Nx allows you to share functionality across multiple applications by creating libraries. In this example, we can create a shared shared-ui library that both apps can use for common UI components, like buttons, headers, etc.
To Generate the shared-ui library:
nx generate @nx/react:lib shared-ui This will create a libs/shared-ui folder. We will place the components that the blog app and admin app can both use inside this folder.
//libs/shared-ui/src/lib/button.tsx

import React from 'react';

interface ButtonProps {
  text: string;
  onClick: () => void;
}

export const Button: React.FC<ButtonProps> = ({ text, onClick }) => {
  return <button onClick={onClick}>{text}</button>;
};
//Export the Button component from libs/shared-ui/src/index.ts
export * from './lib/button';Step 4: Using the Shared Library in Both Apps
Since we created a shared button component, we can now import and use it in both the Blog App and the Admin App.
1. Using the Button in Blog App
To use the button in the blog-app: Open the file apps/blog-app/src/app/app.tsx and modify it to use the Button from the shared-ui library:
//apps/blog-app/src/app/app.tsx

import React from 'react';
import styles from './app.module.css';
import { Button } from '@blog-monorepo/shared-ui';

export function App() {
  return (
    <div>
      <h1>Welcome to the Blog App!</h1>
      <Button text="Read More" onClick={() => alert('Reading more blog posts!')} />
    </div>
  );
}
export default App;
Run the Blog App to verify that the shared button is working:
nx serve blog-appSince, the app will open in the browser, and you will see the Button component rendered on the page.
2. Using the Button in Admin App
Similarly, we can use the same Button component in the Admin App: Open apps/admin-app/src/app/app.tsx and modify it to import and use the Button:
//apps/admin-app/src/app/app.tsx
import React from 'react';
import { Button } from '@blog-monorepo/shared-ui';

const App = () => {
  return (
    <div>
      <h1>Admin Dashboard</h1>
      <Button text="Manage Users" onClick={() => alert('Managing users!')} />
    </div>
  );
};
export default App;
Run the Admin App to verify that the shared button is working:
nx serve admin-appAlso, the admin interface will render, and the Button component will be available just like in the blog app.
Following this, Nx offers built-in features, like the project graph and show project, which help you see the project structure and settings in a visual way.
//to list all the pojects in your console
nx show projects

//to see the project configuration in browser
nx show project blog-app --web //blog-app is project name

//to see the project graph as mentioned below
nx graph
Step 5: Running and Testing the Applications in Nx
Next then, Nx allows you to serve and test each app separately. Hence, you can run tests, lint your code, and build for production easily.
npx nx list @nx/react //To see what capabilities the @nx/react plugin providesRun tests: Nx automatically creates test files for applications and libraries. You can run e2e tests for each app by using the component-test or by setting up a specific test runners like jest, cypress, playwright, further you can modify the testing configuration according to your requirements.
Test Runner: A tool that executes your React end to end tests (e2e) is called a test runner. You can choose to do one test or several tests. In fact, based on the test execution, the test runner displays a report of each test’s success or failure.

nx test blog-app //to test the blog-app
nx test admin-app //to test the admin-app
nx test shared-ui //to test the shared-ui
Lint Code:
Certainly, Linting helps you keep your code clean. Also, you can set up eslint with the command below. Even you can modify the eslint configuration based on your requirements. You can also use the eslint-plugin to enforce module boundaries and check dependencies by applying its rules and configurations.
//this will install the correct version of eslint which is required for your nx version
nx add @nx/eslint
//to install the eslint-plugin
nx add @nx/eslint-plugin
You can run a lint check for any app or library using:
nx lint blog-app //to run a lint check in blog-app
nx lint admin-app //to run a lint check in admin-app
nx lint shared-ui //to run a lint check in shared-ui
Build for Production:
When you’re ready to deploy, use the following commands to easily build your apps for production with Nx.
nx build blog-app //to build the blog-app
nx build admin-app //to build the admin-app
This will generate the optimised production files for each app, and you can deploy them to your server.
Step 6: Scaling with Nx
As your project grows, Nx scales easily. You can add more applications, like a mobile app, and extra libraries, such as data access for managing API requests, as needed. Nx provides a consistent and organised way to structure your code, even for large-scale projects.
For example:
- You could add a data-access library to manage API requests for both apps.
- Add unit tests for each library and app.
- Use libraries to share common logic between the apps, like authentication and theme management.
Conclusion
In conclusion, building and managing React apps with Nx makes development smoother, especially when scaling projects and sharing code between applications. Without a doubt, above in this article, Nx provides all the tools needed for generating apps, libraries, testing and production builds in one place. Hence, it’s a great solution for teams looking to streamline their workflows and build high-quality, scalable React applications. More detailed information, tips and tricks on Nx can get it from Nx official documents. For more information and resources, visit our blog.
Senior Software Engineer, Ceegees Software Solutions Pvt Ltd.
