
What is security testing?
Web application security testing is a process designed to identify vulnerabilities in web applications to prevent potential attacks. This includes both automated and manual methods and employs various methodologies to assess the security of web apps, which are now pervasive across the internet.
Importance
Web application security testing is a critical aspect of modern software development. It involves identifying and mitigating vulnerabilities that could be exploited by malicious actors.
Challenges
Securing web applications is complex due to developer expertise and evolving threats.
Web application security testing methods
The most common methods are:
Dynamic Application Security Testing (DAST)
Tests a running application from the outside, simulating real-world attacks. It’s effective but may miss some vulnerabilities. This is a Black Box testing technique.
Static Application Security Testing (SAST)
Analyzes the source code from the inside, which can identify potential issues but may produce false positives. This is a White Box testing technique.
Interactive Application Security Testing (IAST)
Monitors application behavior by attacking running app to detect vulnerabilities, combining aspects of DAST and SAST but is limited to test environments. This is a Gray Box testing technique.
Out-of-band application security testing (OAST)
Addresses some of DAST’s limitations by finding blind vulnerabilities without modifying the application, and minimizes false positives. The Burp Suite team pioneered this technique.
Use Cases
Variety of Web Technologies: Different types of web apps, such as mobile apps or single-page apps, have unique security testing requirements.
Compliance: Industries like finance and e-commerce have stringent security compliance standards.
Scale and Automation: Large organizations need automated testing tools due to the volume of web apps, though manual testing by experts remains important.
Penetration Testing: Simulates attacks to uncover weaknesses. It’s part of ethical hacking, which also includes bug bounty programs.
Secure Development: Incorporating security from the beginning of development (DevSecOps) is more effective and cost-efficient than addressing security post-development. Automated security testing tools can assist in embedding security practices into the development process, leading to more secure applications on release.
As the main agenda of this blog is to introduce some of the basic features of Burp Suite Community Edition, I’m not elaborating a lot on the Security Testing topic. You can read more on the same in these blogs: Role of Security Testing, How to Conduct a Security Code Review for Your Application. That being said, let’s dive into the Burp Suite topic.
How to use Burp Suite Community Edition?
Download and Install
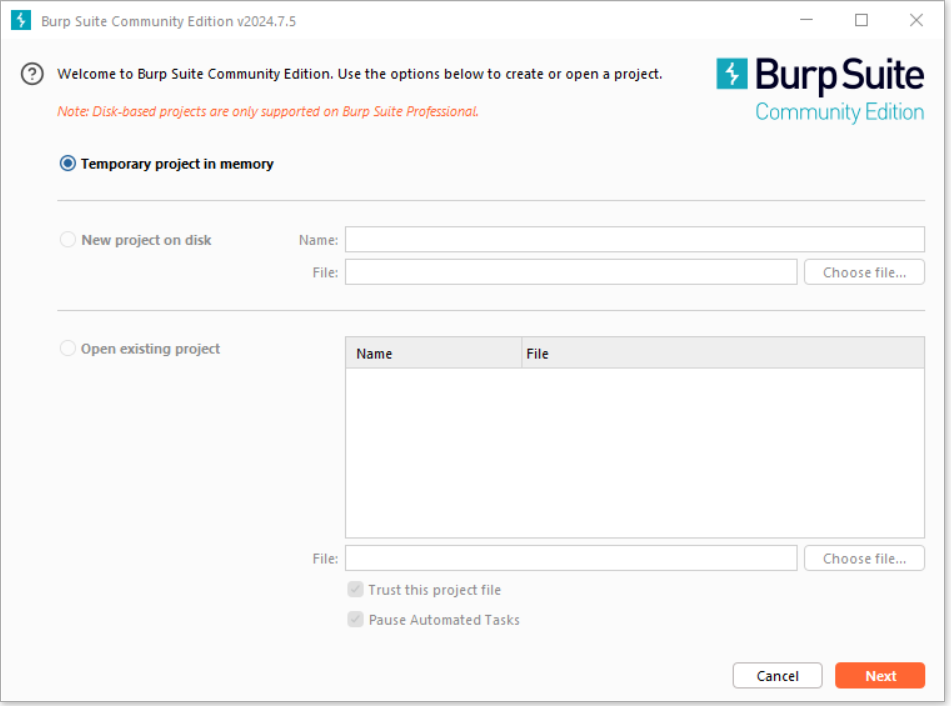
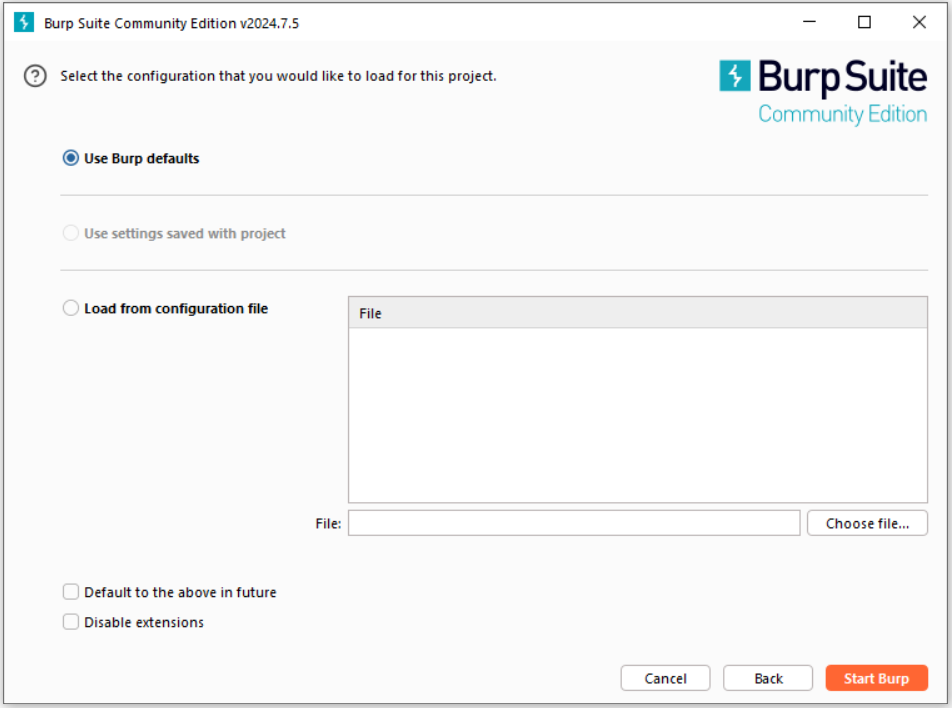
You can download Burp Suite Community Edition from Here. Once downloaded, run the installer and launch Burp Suite. The Community Edition has fewer features compared to the Professional or Enterprise Editions.
Intercepting a HTTP Request with Burp Proxy
Burp Proxy allows you to capture and analyze HTTP requests and responses exchanged between Burp’s browser and the target server, giving you insight into how the website reacts to various actions. Following are the steps to perform this action:
1. Launch browser
You can either use the browser integrated with the Burp Suite application, which is pre-configured to work with Burp or configure the proxy settings of any external browser. We’ll go with the Burp’s browser here.
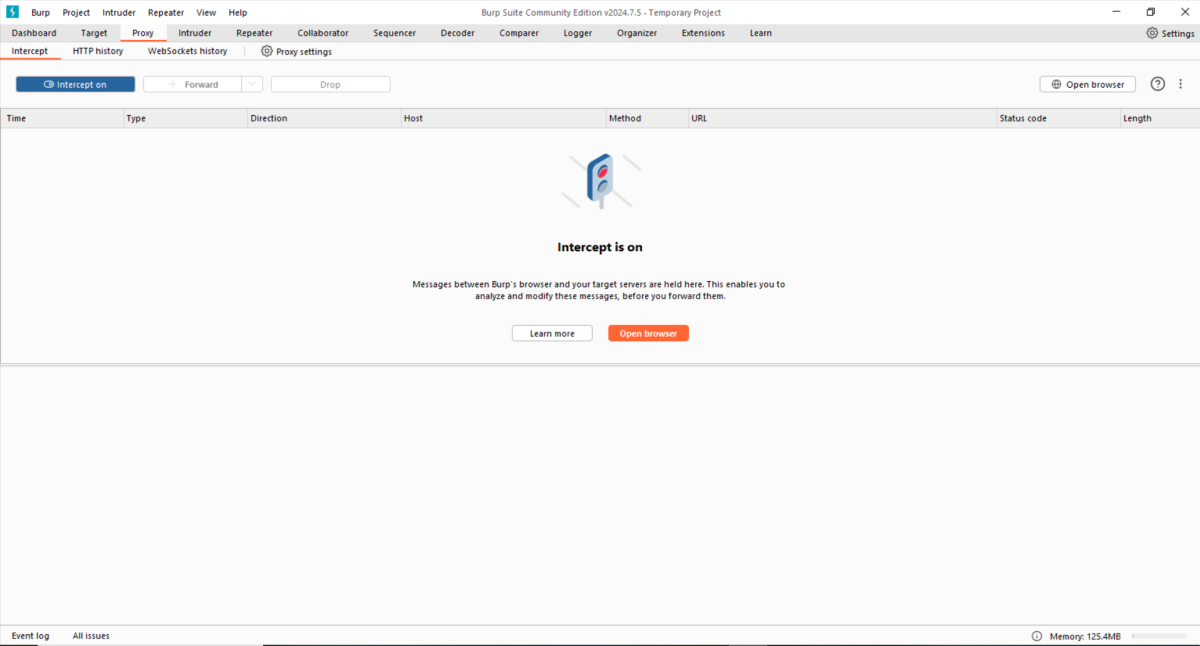
Go to Proxy > Intercept tab and set the toggle to Intercept On. Then click on Open browser button to launch Burp’s pre-configured browser. Keep both Burp Suite and Browser side by side to monitor the actions.
2. Intercept a request
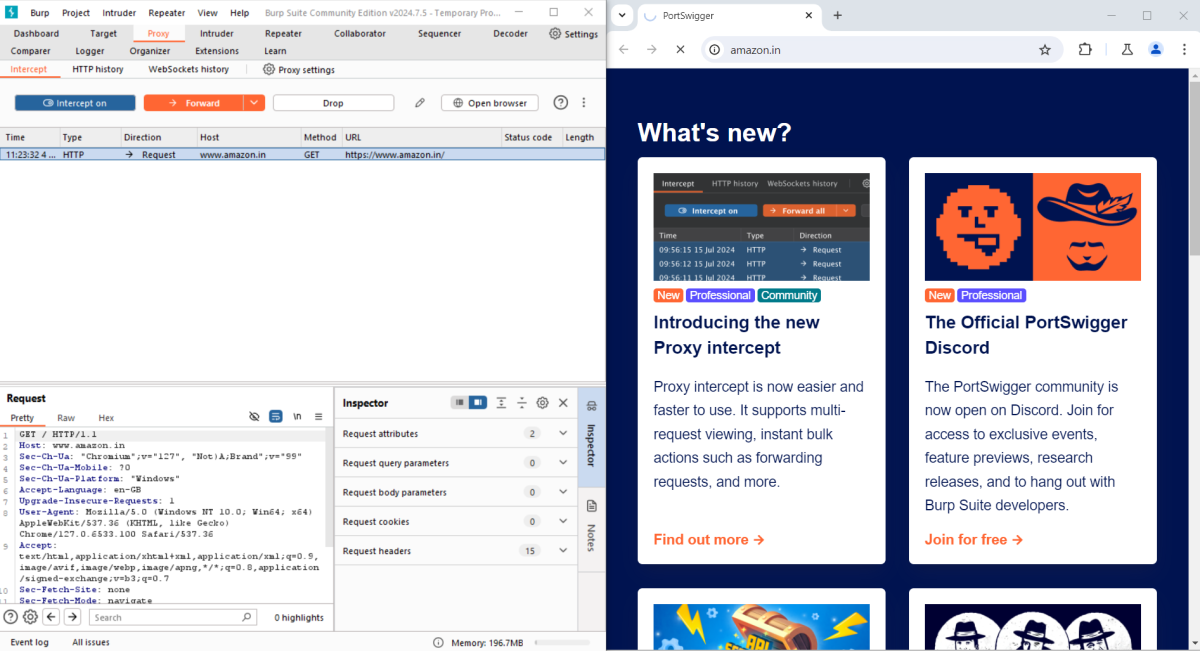
In the Burp’s browser, visit the required AUT web URL and observe the site doesn’t load. Burp Proxy has intercepted the HTTP request that was issued by the browser before it could reach the server. You can see this intercepted request on the Proxy > Intercept tab. You can see various parameters coming under the inspector section. This can be studied and modify as required before forwarding it to the target server.
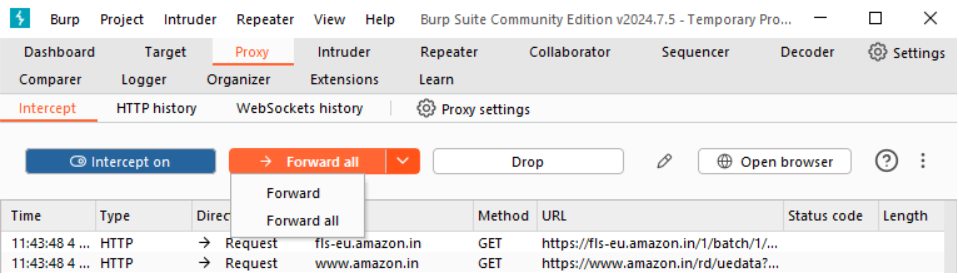
3. Forward the request
There is a Forward or Forward All option available on the button. Click Forward to send the intercepted request. Again clicking Forward will send subsequent intercepted requests. The page will load in the browser only after forwarding all the requests. Choosing the Forward All option and clicking the button will forward all the requests to target server.
4. Intercept Off
If you carefully study the intercept requests, you can observe there are some typical requests sent by browser intercepted as well. This is not necessary for our actions. Hence, user can turn the Interceptor Off for actions which are not really necessary to intercept. At this point of time, the website should load as usual.
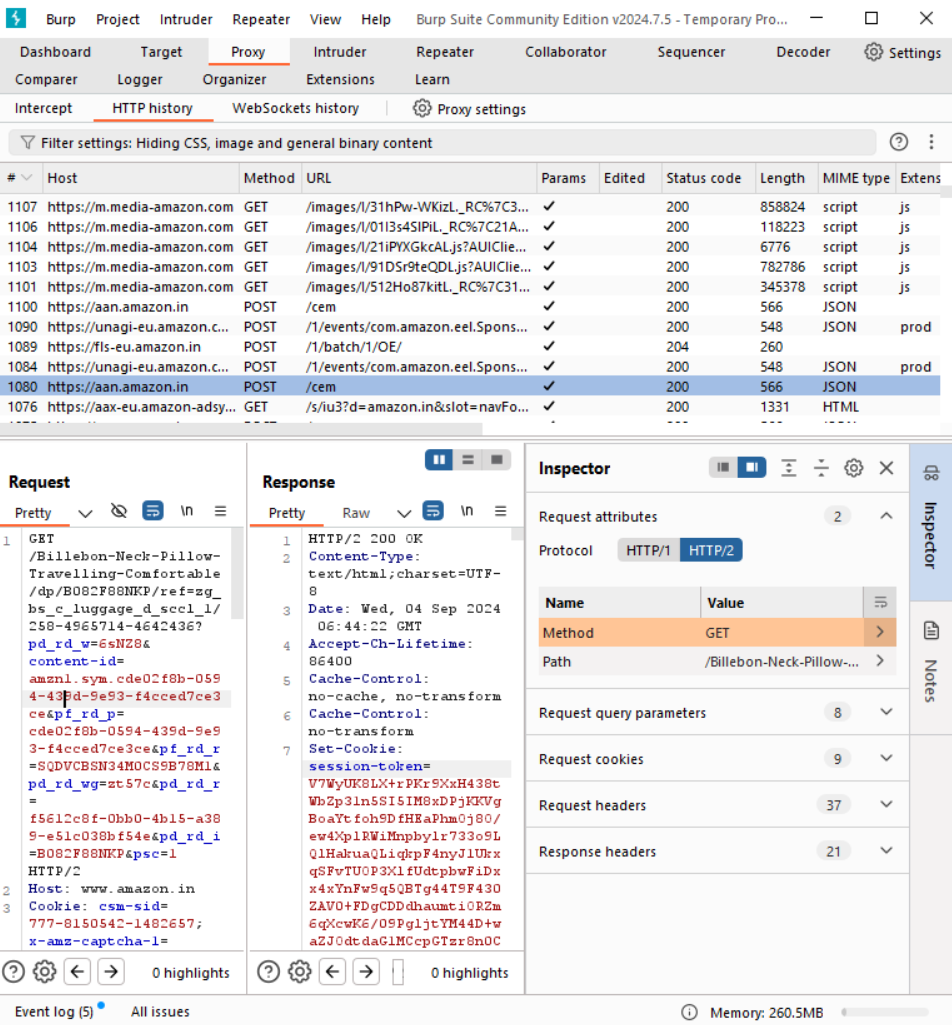
5. View the HTTP history
You can observe the history of all HTTP traffic passed through Burp Proxy under Proxy > HTTP history tab, even though turn off Intercept. Selecting any entry in the history will show you the request and response information.
Modify HTTP requests with Burp Proxy
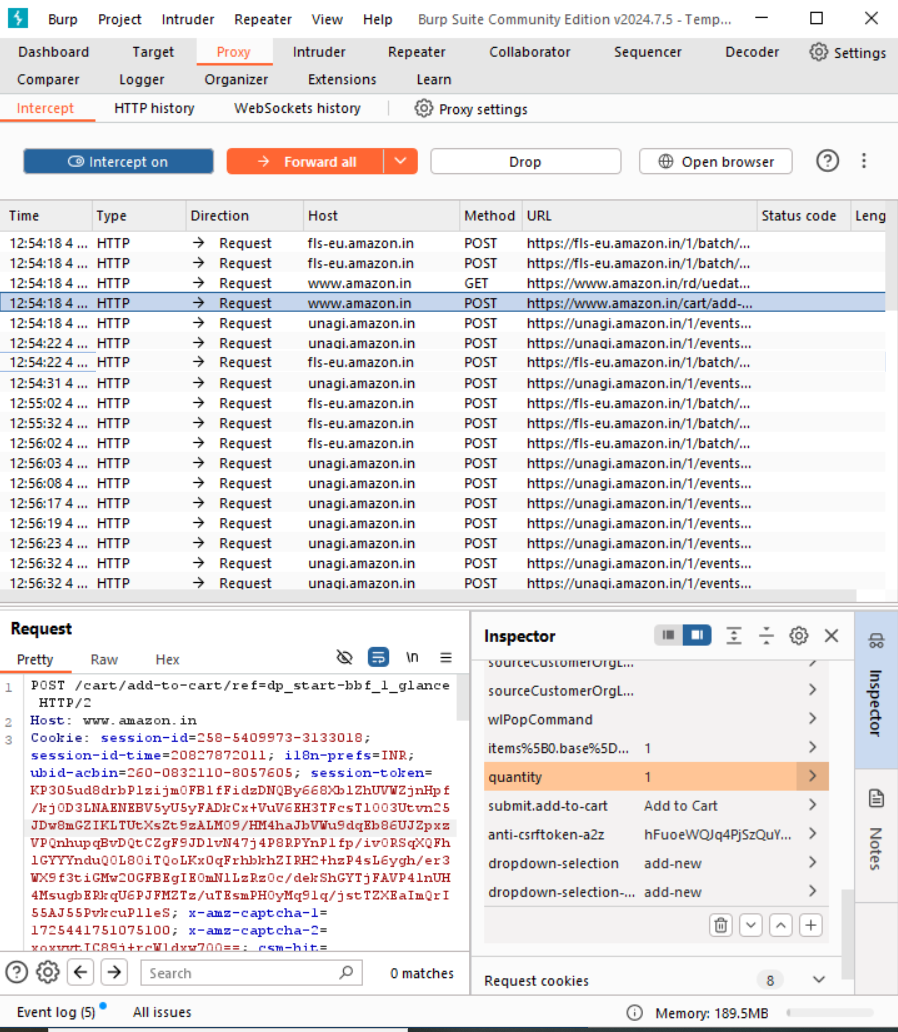
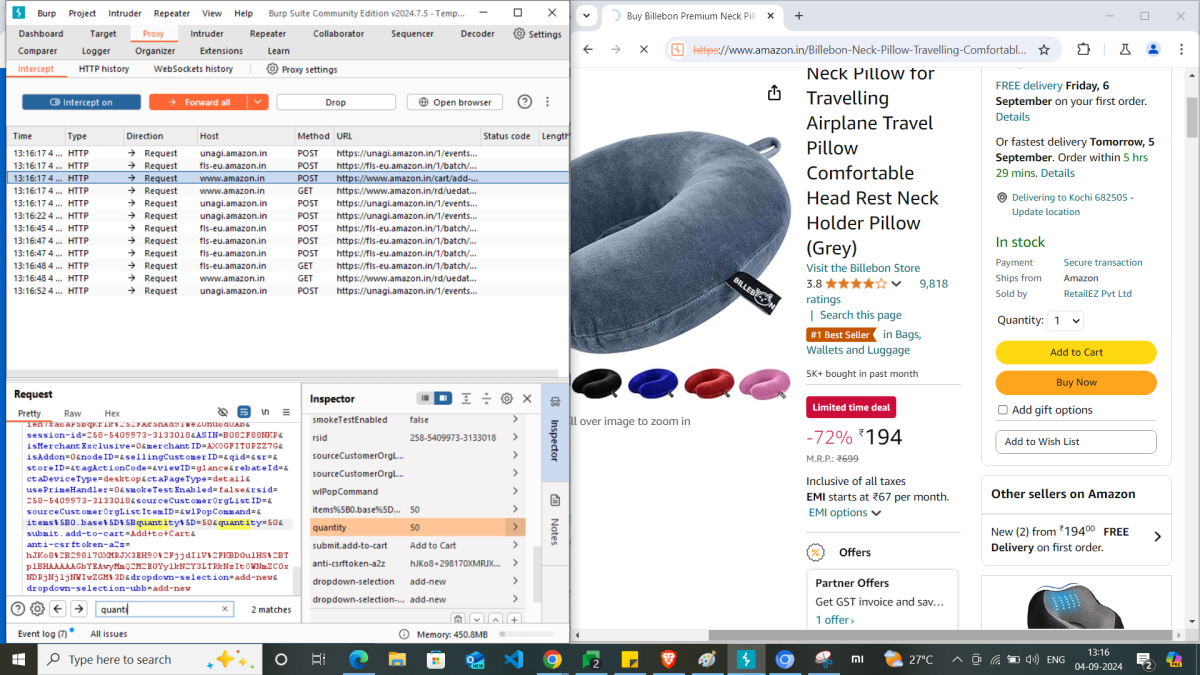
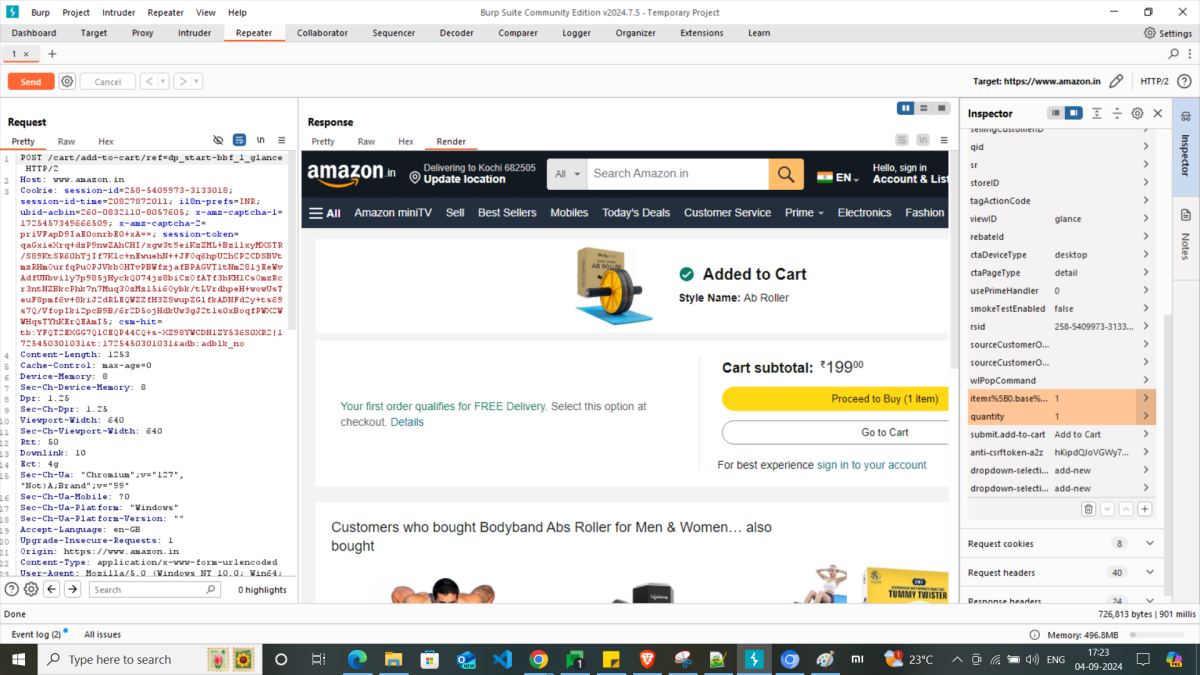
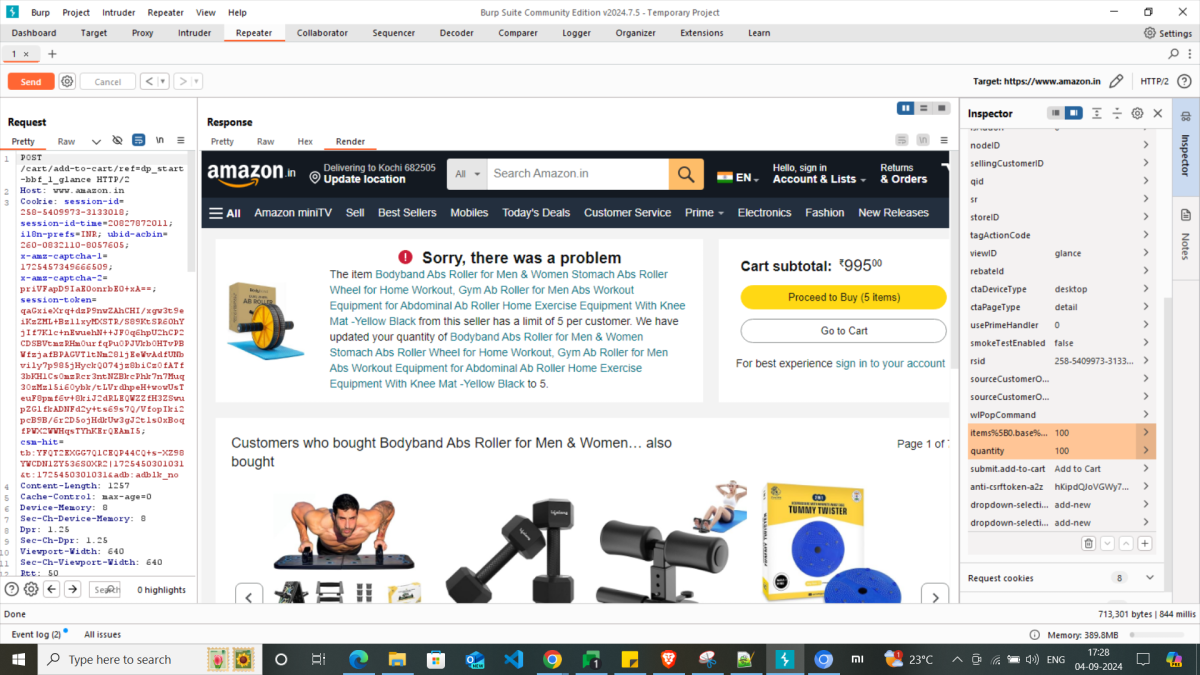
Let’s look at an example of adding a product to cart in Amazon website here. For that, first go the necessary product page in Amazon. Now, turn the Intercept on under Proxy > Intercept and click Add to Cart button of the Amazon product. You can observe the POST request is in Intercept for /cart/add-to-cart/ref=dp_start-bbf_1_glance. Select this request and study the parameters in the body. We won’t be able to see any price parameter here to exploit the security of the application, which is handled really well. Now, we can see a quantity parameter here with value 1.
Amazon allows to choose a maximum of 30 quantity for this item in product details page. Let’s try to add 50 quantity of the product to cart by modifying the request and forward.
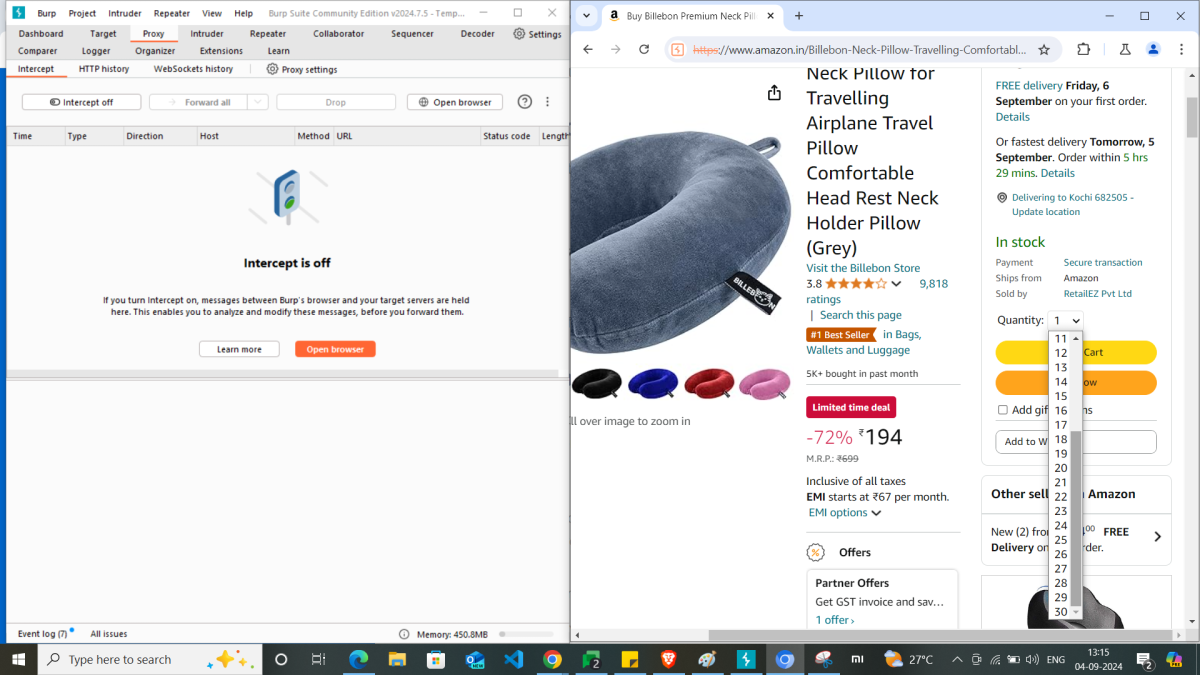
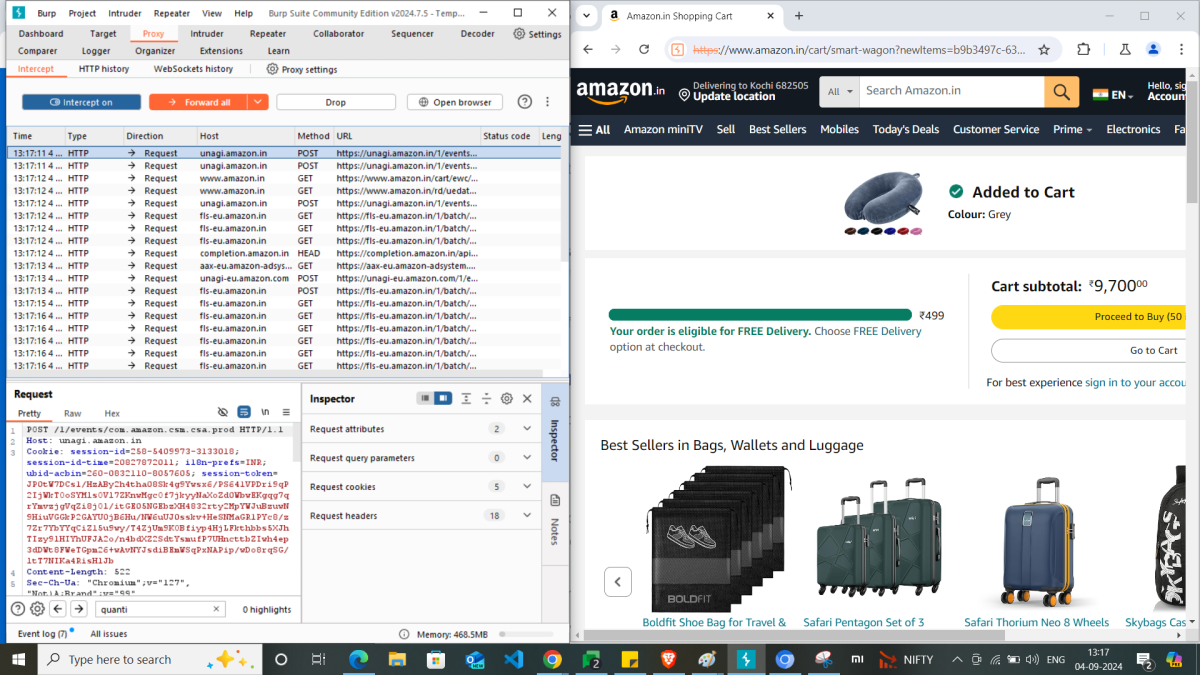
Thus, we can see intercepting the request is allowing the intruder to enter a quantity which is not supposed to. I hope this example is loud and clear to understand how to intercept a request, review and modify to test the security of your application.
Setting the Target Scope
Next, let’s look into what is setting a scope in Burp Suite. Scope helps the Burp Suite to identify which are the URLs and hosts you want to test. This will help you to filter out the unwanted requests generated by the browser, as I have shown in the previous sections. This will significantly help to focus only the necessary traffic.
1. Add to scope
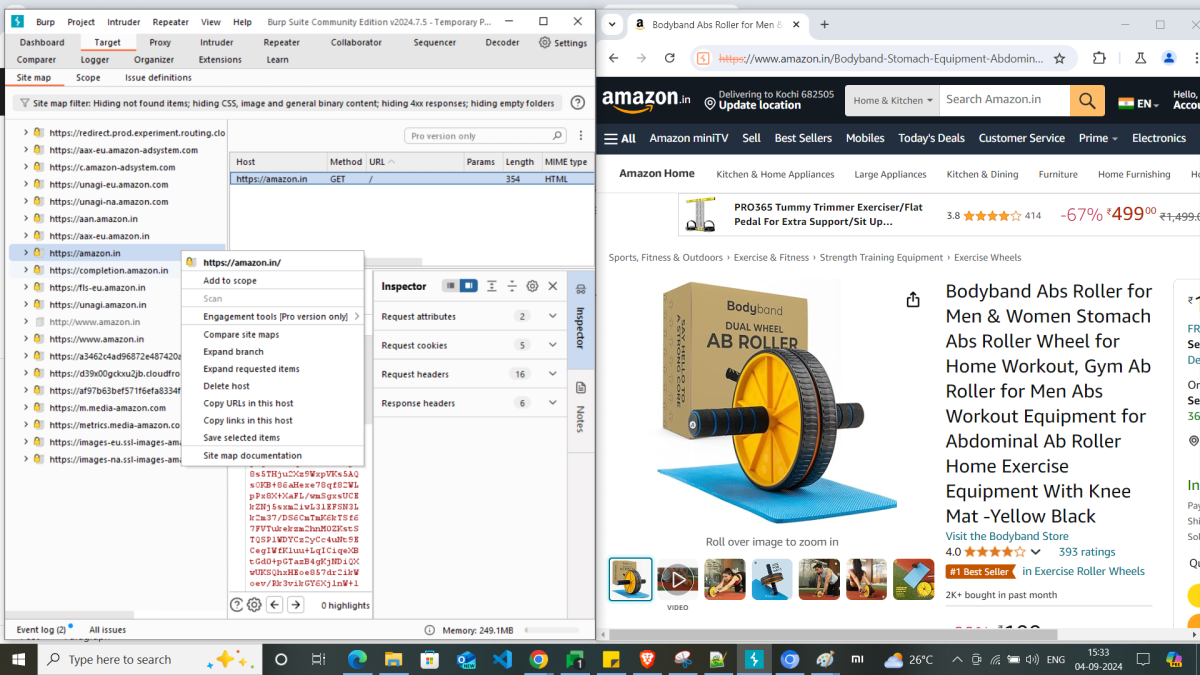
Firstly, explore the target web site by navigating to various product pages. After that, go to Proxy > HTTP history tab. Observe the requests including all those unwanted ones as well along with the ones we’re interested in. So, our purpose is to filter out these ones. For that, you need to navigate to Target > Site map. Right click on the required target hosts and Add to scope.
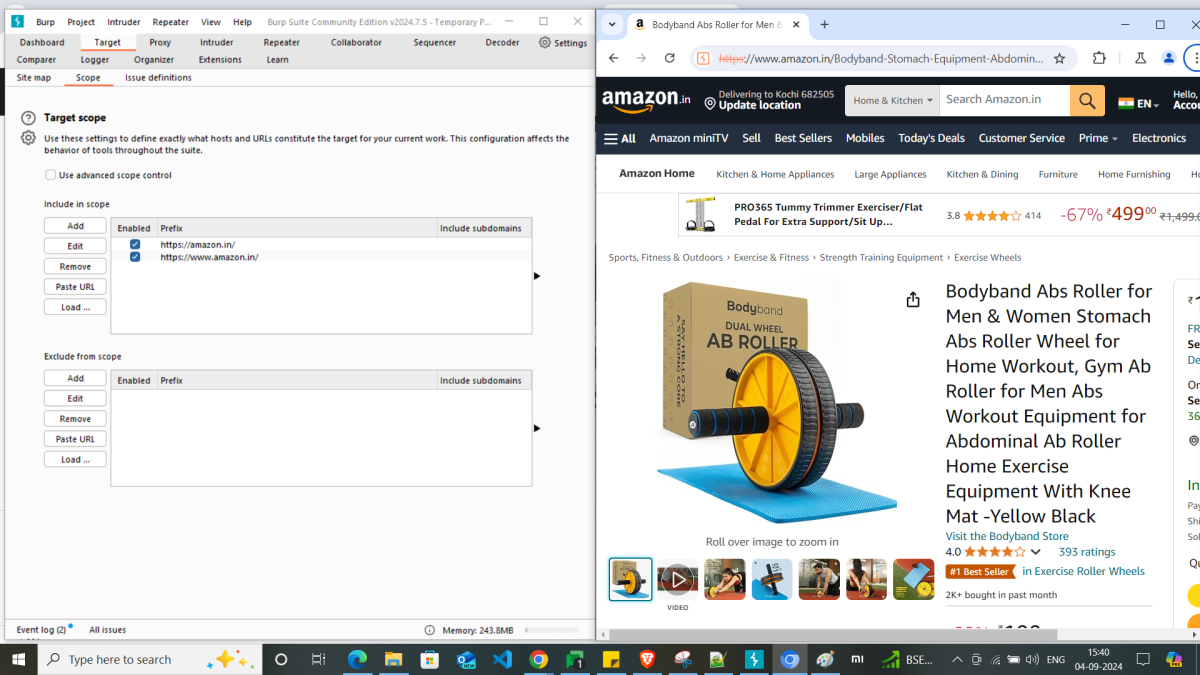
The added scopes can be seen under Target > Scope tab.
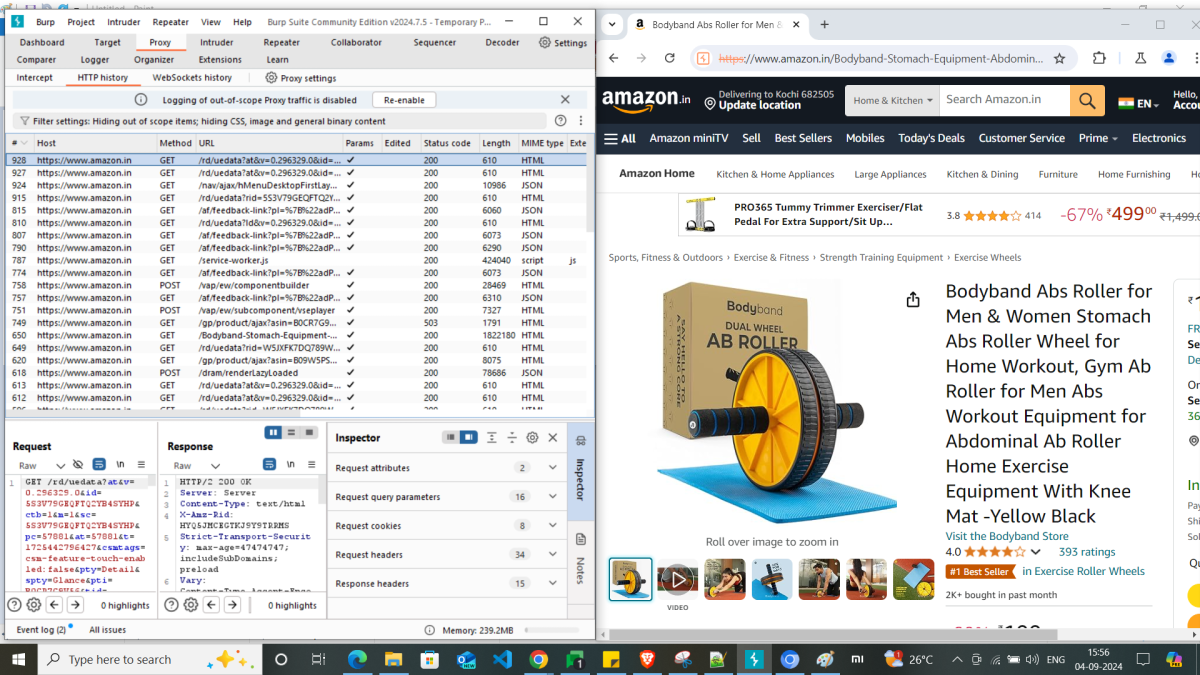
2. Filter HTTP history
The whole purpose of adding targets to scope was to filter out the unwanted HTTP traffic as I already mentioned. For this, you need to go to Proxy > HTTP history tab and click on the Filter settings on top. It’ll open a HTTP history filter pop-up, where Show only in-scope items check-box needs to be checked and Apply.
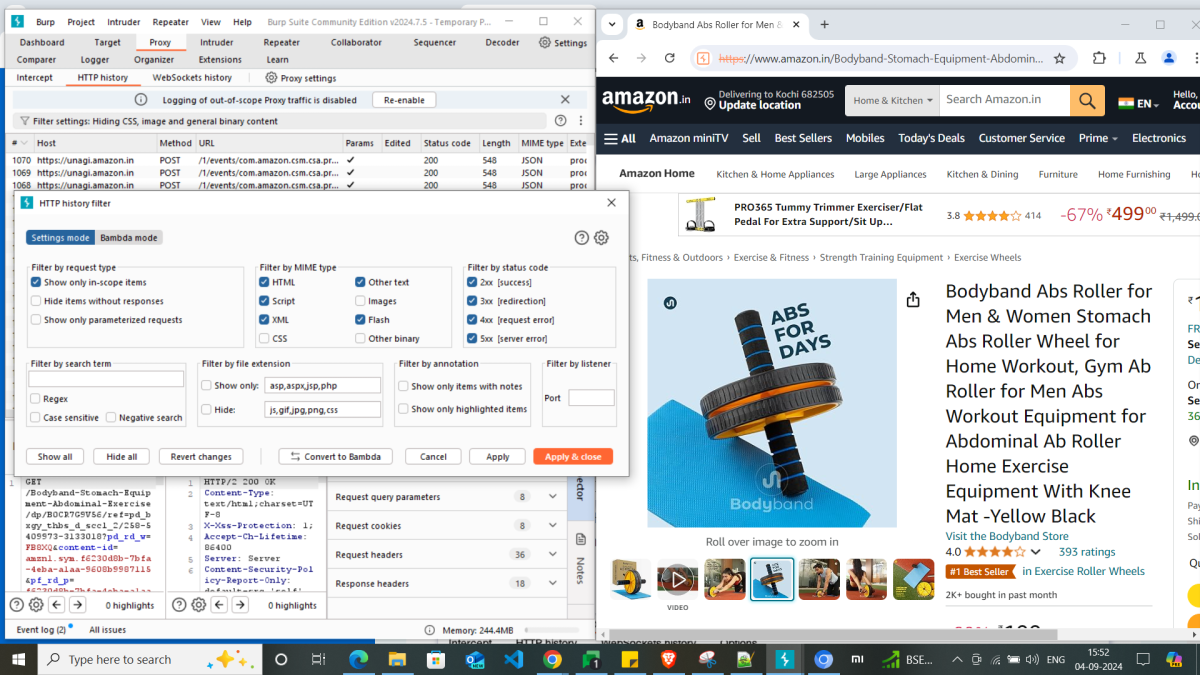
As a result, you’ll find only the in-scope HTTP traffic in the history, if you browse through the target web site afterwards.
Reissuing the requests with Burp Repeater
Burp Repeater is used to send a specific request repeatedly with various inputs to study the response of target website. This feature helps you to perform this action without repeated request Intercept and test the security vulnerabilities.
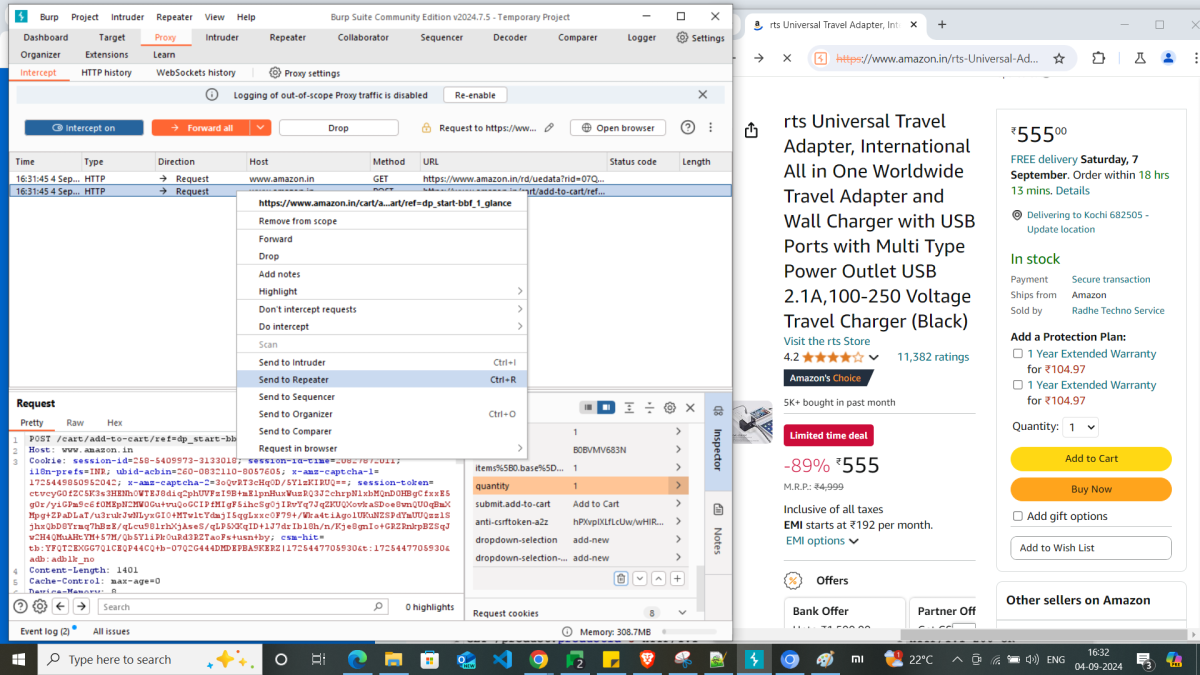
1. Send to Repeater
For this, you need to either right click on the intercepted request or any request from HTTP history tab and Send to Repeater. Here, I’ve sent a POST request to Repeater, for adding product to cart.
2. Usage of Repeater with different inputs
To test security issues that might occur with various range and types of input values, this method is very effective. This will uncover many security vulnerabilities related to input data. Adding three different cases as follows:
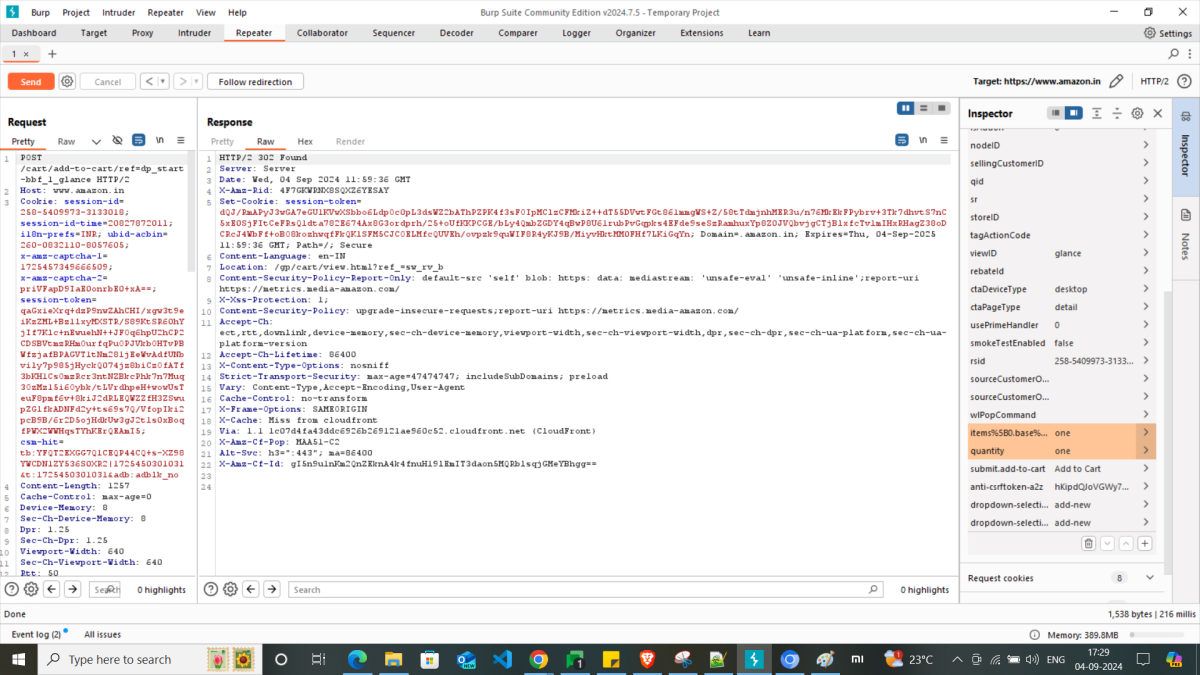
With this example, if you observe the above mentioned test scenarios, it’s clear that Amazon has strong security level validations.
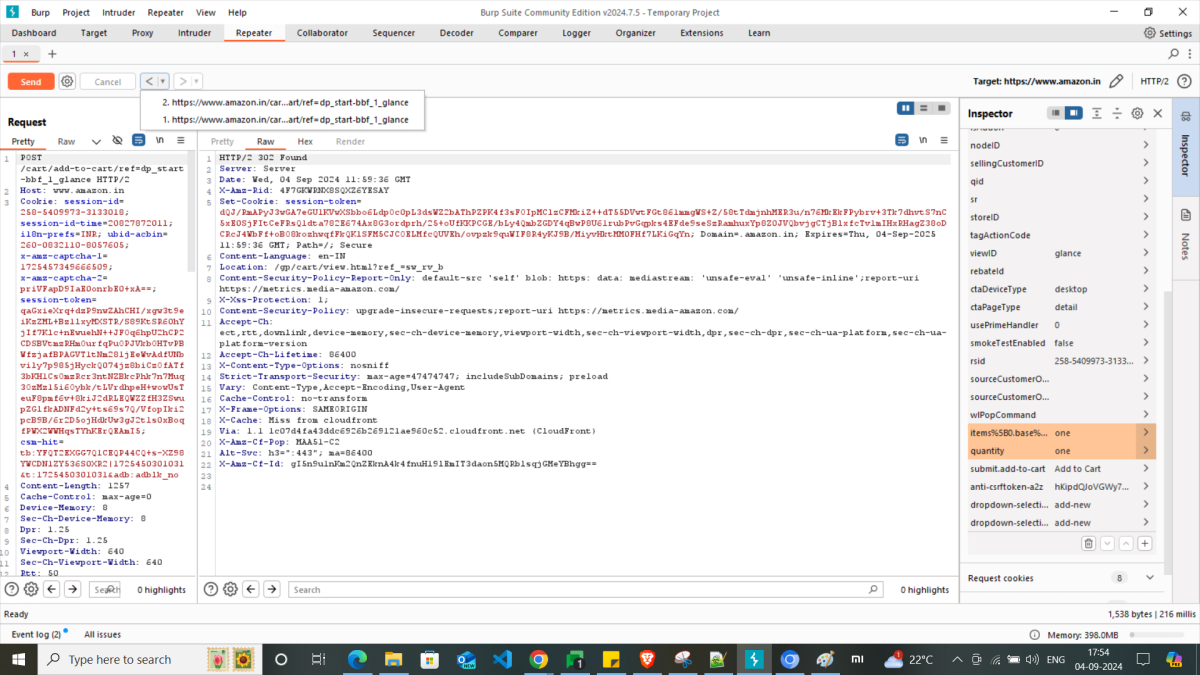
Once you use Repeater with different inputs, you can see the history of URLs requested and navigate through the same using Forward and Backward arrows. Also, these URLs appear as a drop-down list there.
To cover up the whole Burp Suite features, this blog might become too lengthy. Hence, I’ve covered only the basics here. To sum up, Burp Suite Community Edition is an invaluable tool for anyone interested in web application security testing. Its user-friendly interface and powerful features make it accessible to both beginners and experienced professionals. By mastering Burp Suite, you can significantly enhance the security posture of your web applications and protect your users from potential vulnerabilities. Remember, security is an ongoing process, so it’s essential to stay updated with the latest security best practices and tools. By leveraging Burp Suite and other security measures, you can contribute to a safer digital landscape.

Lead QA Engineer at CeeGees Software Solutions Pvt. Ltd.